| A Photo Exhibit in McKay Library's East Wing Gallery August-September 2009  |
In all only twelve men have walked on the moon. This exhibit is a selection of images taken by the astronauts of their lunar experience. | ||||||
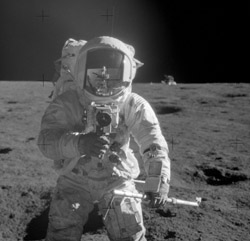 Pete Conrad of Apollo 12 is seen holding core tube and snapping a photo of Alan Bean with his chest-mounted Hasselblad camera |
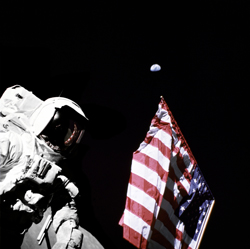 Jack Schmitt, Apollo 17 Lunar Module pilot, is photographed next to the American Flag during extravehicular activity (EVA) of NASA's final lunar landing mission in the Apollo series. The photo was taken at the Taurus-Littrow landing site by Gene Cernan. |
||||||
Apollo 11 Crew: 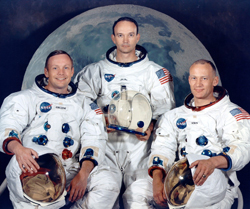 Commander, Neil A. Armstrong, Command Module pilot, Michael Collins, and Lunar Module pilot, Edwin E. "Buzz" Aldrin, Jr. |
Apollo 11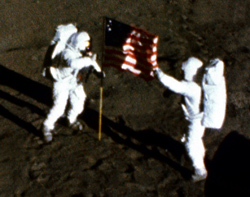 Neil Armstrong (left) and Buzz Aldrin raise the American flag on the Sea of Tranquility. |
Apollo 11
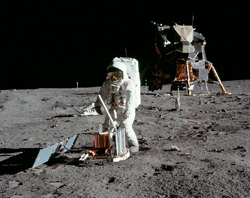 Buzz Aldrin has placed the seismometer package on the surface and is using a built-in maneuvering handle to adjust the pointing and leveling. |
|||||
Apollo 12 crew: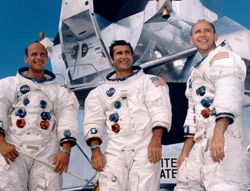 Commander, Charles "Pete" Conrad Jr., Command Module pilot, Richard F. Gordon Jr., and Lunar Module pilot, Alan L. Bean. |
Apollo 12 Alan Bean starts down the ladder of the Lunar Module "Intrepid" to join Pete Conrad on the lunar surface. |
Apollo 12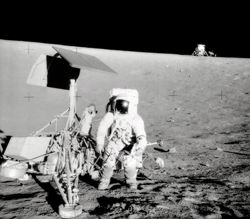 Pete Conrad examines the unmanned Surveyor III spacecraft during the second extravehicular activity. The "Intrepid" is in the right background. This picture was taken by Alan Bean, Lunar Module pilot. |
|||||
Apollo13 crew: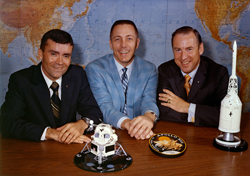 Lunar Module pilot, Fred W. Haise, Command Module pilot, John L. Swigert Jr., and Commander, James A. Lovell. |
Apollo 13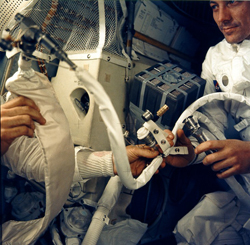 Interior view of the Apollo 13 Lunar Module during the trouble-plagued journey back to Earth. Jack Swigert holds the "mailbox" a jerry-rigged arrangement which the astronauts built to purge carbon dioxide from the Lunar Module. |
Apollo 13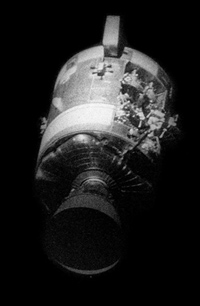 View of the severely damaged Service Module after separation. |
|||||
Apollo14 crew: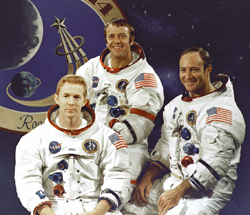 Command Module pilot, Stuart A. Roosa, Commander, Alan B. Shepard Jr. and Lunar Module pilot, Edgar D. Mitchell. |
Apollo 14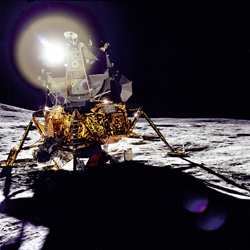 A front view of the Lunar Module "Antares", which reflects a circular flare caused by the brilliant sun. The unusual ball of light was said by the astronauts to have a jewel-like appearance. |
Apollo 14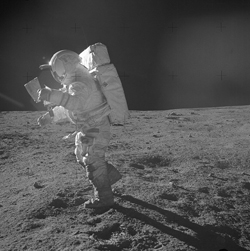 Ed Mitchell moves across the lunar surface as he looks over a traverse map during extravehicular activity. Black lunar dust can be seen clinging to the boots and legs of the space suit. |
|||||
Apollo 15 crew: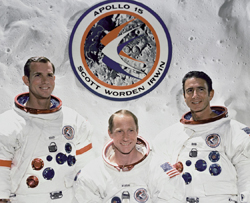 Commander, David R. Scott, Command Module pilot, Alfred M. Worden and Lunar Module pilot, James B. Irwin. |
Apollo 15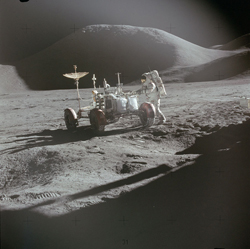 Jim Irwin at the Lunar Rover at end of the first extravehicular activity of Apollo 15. |
Apollo 15 Jim Irwin works at the LRV during EVA-1 close-out Ā |
|||||
Apollo 16 crew: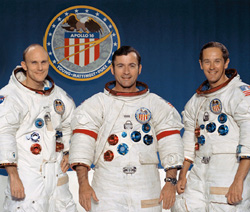 Thomas K. Mattingly II, Command Module pilot, John W. Young, Commander, and Charles M. Duke Jr.,Lunar Module pilot |
Apollo 16 Charlie Duke working at the Rover |
Apollo 16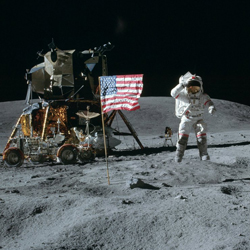 John Young jumps off the ground and salutes for this superb tourist picture. |
|||||
Apollo 17 crew: Eugene A Cernan (seated), Commander, Harrison H. "Jack" Schmitt, Lunar Module pilot (standing on left) and Ronald E. Evans (standing on right), Command Module pilot. |
Apollo 17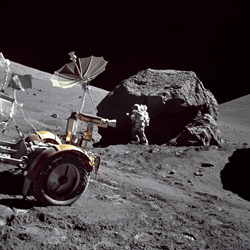 Jack Schmitt is standing next to a huge, split boulder at Station 6 on the sloping base of North Massif during the third Apollo 17 extravehicular activity. Photograph by Commander Cernan |
Apollo 17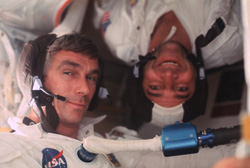 Gene Cernan (left) and Ron Evans pose in the Command Module of Apollo 17 during the outbound trip. |
|||||
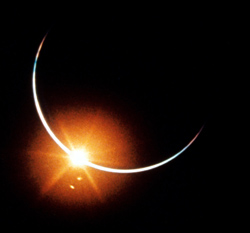 The Earth eclipses the Sun during the transearth journey of Apollo 12 |
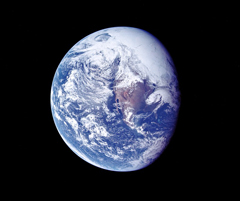 Earth as seen from Apollo 16 |
|
|||||
| Library Exhibits Homepage | David O. McKay Libray Homepage |